Crème brûlée — the name alone sounds elegant, doesn’t it? But behind its fancy French name lies a dessert that’s surprisingly simple yet irresistibly decadent. The perfect caramelization on top with that crackly sugar crust and the smooth, creamy custard underneath is what dreams are made of. But here’s the big question: What is the secret to crème brûlée? Why do some recipes result in perfection while others end up a curdled mess?
In this article, we’ll crack the code (pun intended!) to achieving flawless crème brûlée. From ingredient selection and baking techniques to the most common mistakes and expert secrets, every detail you need to master this classic French dessert will be uncovered. So, roll up your sleeves, grab your culinary torch, and let’s dive in!
Introduction to Crème Brûlée
What is Crème Brûlée?
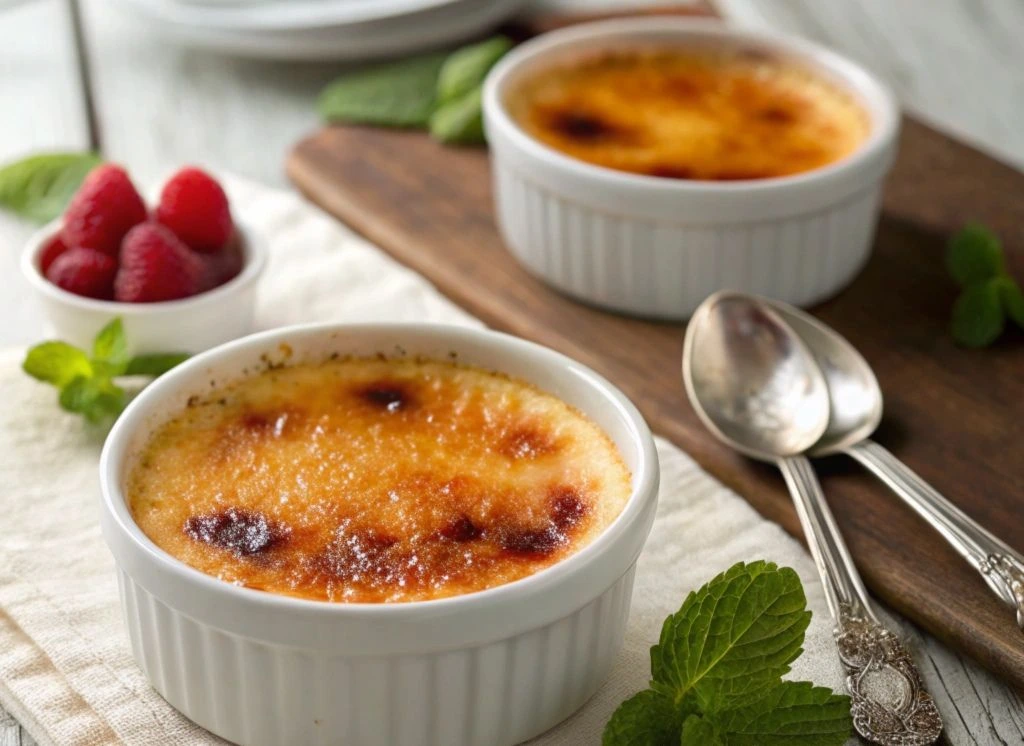
Crème brûlée, pronounced “krem broo-LAY,” is a custard-based dessert that’s as luxurious as it sounds. It’s a silky, vanilla-infused custard topped with a brittle sugar shell that you break with the back of a spoon — just like in the movies. The contrast of textures, from creamy to crunchy, is what makes this French dessert an all-time favorite.
While the name is French, crème brûlée’s origins are a little more mysterious. Believe it or not, similar versions of this dessert can be traced back to Spain’s “Crema Catalana” and even England’s “Trinity Cream.” But it was the French who perfected it, giving it that iconic brûléed (burnt) sugar crust. And since then, it’s become a restaurant showstopper and a kitchen must-try for home cooks.
Why is Crème Brûlée So Popular?
What makes crème brûlée so special? Simple — it’s all about texture and flavor. The moment you crack that thin layer of caramelized sugar and scoop out the velvety custard below, you know you’re in for a treat. But there’s more to its charm than just taste.
- Elegance on a Plate: This dessert looks sophisticated, but it’s easier to make than you might think. It’s a perfect “fancy” dessert to impress guests without sweating in the kitchen.
- Universal Appeal: Vanilla is a crowd-pleaser. Plus, you can add twists with flavors like chocolate, coffee, or even matcha.
- DIY Drama: The dramatic “crack” of the sugar crust adds a playful, interactive moment. It’s a sensory experience, not just a taste.
The Importance of the ‘Secret’ to Perfect Crème Brûlée
If you’ve tried to make crème brûlée at home and ended up with runny custard or burnt sugar, you’re not alone. There’s a reason so many people search for “What is the secret to crème brûlée?” It’s because success relies on mastering a few key techniques.
Here’s why knowing the secrets matters:
- Avoiding Mistakes: From overheating the custard to burning the sugar crust, it’s easy to get it wrong. But once you know the tricks, you’ll nail it every time.
- Consistent Results: If you’ve ever wondered why restaurant crème brûlée always tastes better, it’s because they follow certain “golden rules” that we’ll reveal here.
- Achieving Perfection: Knowing when to stop cooking, how to caramelize sugar properly, and what ingredients to use can mean the difference between a 5-star dessert and a kitchen disaster.
With that said, we’re just getting started. In Part 2, we’ll dive into the ingredients that make all the difference in creating that iconic, silky-smooth custard. Stick around, because you’re about to uncover the secrets to one of the most delicious desserts on Earth.
Essential Ingredients for the Perfect Crème Brûlée
The Role of High-Quality Ingredients
When it comes to crafting the perfect crème brûlée, every ingredient counts. Unlike some desserts where you can get away with substitutions, this classic French dessert demands the best. Each component serves a vital purpose in achieving the silky-smooth texture and rich flavor that make this dish legendary. From the cream to the sugar, every choice you make in the kitchen influences the final result.
The key to success lies in simplicity. Crème brûlée isn’t a dessert that hides behind bold spices or heavy toppings. Instead, it’s all about highlighting a few simple ingredients at their absolute best. That’s why chefs always emphasize the importance of quality over quantity. Once you understand how each ingredient works, you’ll be able to answer the timeless question: “What is the secret to crème brûlée?”
Key Ingredients You Need for Success
To master crème brûlée, you only need a few simple ingredients — but they have to be the right ones. Here’s what you’ll need in your kitchen arsenal:
1. Cream: Full-Fat vs. Alternatives
The heart of a custard-based dessert like crème brûlée is heavy cream. Full-fat cream provides that rich, velvety texture everyone craves. Lower-fat substitutes like half-and-half or milk just don’t deliver the same smoothness. If you’re tempted to cut calories, think again. Using full-fat cream is one of the biggest secrets to achieving custard perfection.
2. Sugar: White, Brown, or Specialty Sugars?
The type of sugar you use matters — and not just for sweetness. While white granulated sugar is most commonly used in the custard itself, brown sugar is sometimes sprinkled on top to achieve a deeper caramel flavor. When it comes to the iconic perfect caramelization of the sugar crust, stick to superfine white sugar. It melts quickly and evenly for that essential glass-like finish.
3. Egg Yolks: Fresh vs. Pasteurized
Egg yolks are the backbone of crème brûlée. They’re responsible for thickening the custard as it bakes. For the best results, use fresh egg yolks rather than pasteurized ones, as freshness affects the texture. Too many egg yolks, however, can make the custard dense. Striking the perfect balance is one of the many secrets chefs swear by.
4. Vanilla: Pods, Extract, or Alternatives?
The classic flavor of crème brûlée comes from vanilla. Whether you use vanilla beans, vanilla paste, or high-quality vanilla extract, the goal is the same: pure, aromatic flavor. The best option is to use a fresh vanilla bean. Simply slice it open, scrape out the seeds, and infuse them into the cream. This technique produces a more robust vanilla taste and those iconic black specks in the custard.
Ingredient Substitutions and Their Impact
While it may be tempting to cut costs or calories, making ingredient swaps can drastically affect your results. Here’s what you should know before swapping ingredients:
- Heavy Cream Substitutes: If you use half-and-half or whole milk, expect a thinner, less creamy custard. The texture won’t have that rich mouthfeel.
- Sugar Variations: Brown sugar on top may add flavor, but it’s harder to achieve that classic, glassy caramel crunch. Stick to white sugar for best results.
- Vanilla Extract vs. Vanilla Bean: If you must use extract, go for pure vanilla, not imitation. The difference in taste is noticeable.
Every ingredient in crème brûlée works together to create its signature flavor and texture. Once you master the art of ingredient selection, you’ll be one step closer to answering, “What is the secret to crème brûlée?”
Step-by-Step Guide to Making Crème Brûlée
Preparation: Setting Up Your Kitchen for Success
Before you even crack an egg, it’s smart to get your kitchen ready. Preparation is half the battle when making homemade crème brûlée. Start by gathering all your ingredients and equipment. You’ll need ramekins, a baking dish, and most importantly, a culinary torch (more on that later).
Preheat Your Oven: Most recipes call for an oven temperature of 325°F (163°C), but check your specific recipe for details.
Boil Water: You’ll be using a water bath to bake the custards, so get a kettle of water boiling early. This step prevents the custard from overheating and curdling — a crucial technique that professional chefs swear by.
Arrange the Ramekins: Place your ramekins in a baking dish, leaving space between them to allow for even heat distribution.
Mixing the Custard: Getting the Texture Just Right
This is where the magic begins. The smooth, velvety custard that makes crème brûlée so famous starts with a simple process of whisking egg yolks, sugar, and cream together. But, as simple as it sounds, there are a few tricks to get it right.
- Whisking Without Foam: While you want to whisk the egg yolks and sugar until combined, avoid whipping in too much air. Air bubbles create an uneven custard surface.
- Heating the Cream: Gently heat the cream with vanilla, just until it starts to steam. Don’t let it boil! A small mistake here can lead to curdled custard.
- Tempering the Eggs: Slowly add the hot cream into the yolk mixture while stirring constantly. This step, called tempering, prevents the eggs from scrambling. If you’ve ever had grainy custard, it’s because this step wasn’t done correctly.
Baking the Custard: Water Bath or No Water Bath?
If you’ve ever wondered why your custard is grainy or cracked, it’s probably because you skipped the water bath (also known as a bain-marie). It’s one of the non-negotiable secrets to smooth custard.
Why Use a Water Bath? The water bath ensures gentle, even cooking. Without it, the sides of the custard may cook too quickly, leaving the center underdone.
How to Do It Right:
- Pour boiling water into the baking dish, filling it halfway up the sides of the ramekins.
- Bake for about 30-40 minutes, or until the custard jiggles like Jell-O but isn’t liquid in the center.
The Art of Caramelization: Perfecting the Sugar Topping
Finally, it’s time to answer the most iconic part of the question: “What is the secret to crème brûlée?” It’s the perfect sugar crust. Here’s how you can achieve it like a pro.
- Chill the Custard First: The custard must be cold before adding the sugar. If it’s warm, you’ll end up with a melted mess instead of a glassy top.
- Sprinkle Sugar Evenly: Use fine white sugar and spread it in a thin, even layer. Avoid clumps.
- Use the Right Torch: A culinary torch is essential for controlled heat. Move it in a slow, circular motion until you see the sugar bubbling and browning evenly.
- Perfect Timing: Stop torching as soon as you reach that deep, golden-brown color. If you wait too long, the sugar will burn and taste bitter.
If you don’t have a torch, don’t worry. You can achieve caramelization using your oven’s broiler. It takes a little longer and requires more attention, but it works.
Crème brûlée isn’t just a dessert — it’s an experience. From the moment you crack that caramelized top to the creamy custard below, every bite is a sensory delight. By following these step-by-step instructions, you’re not just making a dessert, you’re unlocking the secret to crème brûlée that chefs have known for generations.
Up next, we’ll explore common mistakes and how to avoid them in Part 4. So, stay tuned and get ready to learn the insider tips that will make your crème brûlée foolproof every time.
Part 4: Common Mistakes and How to Avoid Them
Overcooked or Undercooked Custard
One of the most frustrating outcomes when making crème brûlée is ending up with custard that’s either overcooked or undercooked. If you’ve ever experienced watery custard or a curdled mess, you’re not alone. This happens more often than you think, but thankfully, it’s avoidable.
Why it Happens:
- Overcooking occurs when the oven temperature is too high or the custard is left in the oven for too long.
- Undercooking happens when the custard is pulled from the oven too early, leaving the center runny and loose.
How to Avoid It:
- Always use a water bath to create gentle, even heat. This prevents hot spots that can overcook parts of the custard.
- Stick to the right oven temperature (typically 325°F) and avoid opening the oven too often, as it releases heat.
- Check for doneness by gently shaking the ramekins. The center should jiggle like Jell-O, not slosh like liquid.
Cracked Surface Issues
The moment you see cracks on your beautiful custard-based dessert, you know something went wrong. It’s not just a visual flaw — cracks can affect the overall texture of your crème brûlée.
Why it Happens:
- Custard cracks when it dries out. This usually happens if it’s baked at too high of a temperature or if it cools too quickly.
How to Avoid It:
- Use a water bath to regulate the temperature around the custard.
- Let the custard cool gradually. Rapid temperature changes, like taking it straight from the oven to the fridge, can cause cracking.
- Cover the ramekins lightly with foil while baking to create a more humid environment.
Burnt or Grainy Sugar Topping
Perfect caramelization of the sugar crust is one of the hallmarks of a successful crème brûlée. But sometimes, you end up with a burnt, bitter crust or a gritty, uneven texture that just doesn’t crack right.
Why it Happens:
- Burnt Sugar: The torch was left on one spot for too long.
- Grainy Texture: Too much sugar was added on top, or it wasn’t spread evenly.
How to Avoid It:
- Use a fine, even layer of sugar — superfine sugar works best as it melts quickly and smoothly.
- Move the torch constantly in circular motions instead of focusing on one area.
- Stop torching as soon as the sugar turns golden brown. It only takes a second for it to go from caramelized to burnt.
Tips to Avoid These Mistakes Every Time
If you want a foolproof method for avoiding these classic mistakes, follow these expert tips:
- Patience is Key: Rushing any part of the process, from mixing to cooling, will likely cause issues.
- Watch the Bake Time: Every oven is different. If your custards are jiggly but not liquid, remove them from the oven.
- Invest in a Culinary Torch: Broiling can work in a pinch, but a torch gives you precision control.
- Use a Thermometer: If you’re unsure about doneness, a thermometer inserted into the custard should read 170-175°F.
By avoiding these mistakes, you’ll be able to answer the age-old question: “What is the secret to crème brûlée?” The answer is simple — attention to detail and patience. For more delicious dessert tips, check out our Perfect Crème Brûlée Recipe.
Secrets to a Perfect Crème Brûlée
Why Temperature Control is Essential
If you’ve ever asked, “What is the secret to crème brûlée?”, here’s a major one — temperature control. From heating the cream to baking the custard, precision is everything.
Why it Matters:
- High temperatures can cause the eggs to scramble, leading to grainy custard.
- Low temperatures can result in undercooked, runny centers.
Secret Tip:
- Heat the cream slowly, just until it begins to steam (not boil), and gradually pour it into the yolk mixture to avoid curdling.
- Bake at a low, consistent temperature, and don’t open the oven door too often.
The Role of Patience: Allowing for Proper Cooling
If you’ve ever been too eager to taste your crème brûlée, you’ve probably noticed a mushy, unset texture. This happens when it hasn’t cooled long enough.
Why it Matters:
- Cooling allows the custard to set, firming up its structure.
- Without enough chill time, you’ll end up with a sloppy, loose custard.
Secret Tip:
- Let your crème brûlée cool at room temperature before refrigerating it for at least 4 hours — overnight is even better.
Why Fresh Ingredients Make a Difference
You’ve probably heard this advice a thousand times, but it’s especially true for crème brûlée. Fresh, quality ingredients create a more flavorful, aromatic dessert.
Why it Matters:
- Fresh egg yolks thicken better and taste fresher.
- Real vanilla beans provide a rich, aromatic flavor that extract just can’t match.
Secret Tip:
- Use fresh egg yolks, not liquid yolk substitutes.
- Scrape fresh vanilla beans directly into the cream, letting it infuse for deeper flavor.
The Perfect Sugar-to-Custard Ratio
When it comes to that famous glassy top, sugar balance is everything. Too much, and it burns. Too little, and it won’t caramelize properly.
Why it Matters:
- Too much sugar leads to a thick, hard crust that’s tough to crack.
- Too little sugar results in a patchy, uneven top that looks unappetizing.
Secret Tip:
- Measure 1 to 1.5 teaspoons of superfine sugar for each ramekin.
- Spread it in an even layer, tapping it gently to remove excess.
Using a Culinary Torch vs. Broiler for Caramelization
If you’re wondering how chefs achieve that perfect caramelization on top of crème brûlée, the secret lies in using a culinary torch.
Why it Matters:
- A torch allows for precise control, letting you caramelize the sugar evenly.
- A broiler can work, but it heats unevenly and can burn the sugar before it melts.
Secret Tip:
- Invest in a culinary torch — it’s affordable and easy to use.
- Move the flame in a slow, circular motion until you see that perfect golden-brown color.
Pro Chef’s Ultimate Secret to Perfect Crème Brûlée
If you only remember one takeaway, let it be this: Slow and steady wins the race. From heating the cream to chilling the custard, patience is the ultimate secret ingredient. By keeping your temperature low, avoiding shortcuts, and using fresh, high-quality ingredients, you’ll unlock the secret to mastering crème brûlée like a pro.
If you’re ready to put these tips into action, check out our Perfect Crème Brûlée Recipe. You’ll be cracking into that sugar crust in no time!
Variations and Flavor Twists for Crème Brûlée
Classic Vanilla Crème Brûlée
If you’re searching for the gold standard of crème brûlée, the classic vanilla version is it. This timeless flavor is what most people think of when they hear “crème brûlée.” It’s smooth, rich, and flavored with the sweet aroma of vanilla, giving you the perfect combination of taste and texture.
How to Make It:
- Use fresh vanilla beans for the best flavor. Scrape out the seeds and infuse them into the cream for that signature taste.
- Follow the standard crème brûlée recipe, ensuring you use full-fat cream and fresh egg yolks.
- For an extra pop of flavor, consider using vanilla bean paste, which is more potent than extract.
Why stick to vanilla? Simple — it’s classic, and it pairs perfectly with fresh fruit, caramel, or chocolate on the side.
Flavored Variations: Chocolate, Matcha, and More
While vanilla is a fan favorite, you can take things up a notch with unique flavor variations. Want to wow your guests? Try one of these flavor twists for a creative spin on the classic.
Popular Variations:
- Chocolate Crème Brûlée: Replace part of the cream with melted dark chocolate. The result is a rich, indulgent dessert that chocolate lovers will adore.
- Matcha Crème Brûlée: Add a teaspoon of matcha powder to the cream for a subtle earthy flavor and bright green color.
- Coffee Crème Brûlée: Infuse the cream with fresh espresso or coffee grounds to create a café-style dessert.
- Coconut Crème Brûlée: Swap out part of the cream for coconut milk to add a tropical twist.
- Pumpkin Spice Crème Brûlée: Add pumpkin puree and a dash of cinnamon, nutmeg, and cloves for a seasonal autumn treat.
Each of these twists maintains the smooth custard texture but introduces new flavors that make every spoonful a surprise.
Using Seasonal Ingredients for a Fresh Twist
Want a dessert that matches the season? Use fresh, seasonal ingredients to add a burst of flavor. This approach makes your crème brûlée feel extra special and unique.
Seasonal Flavor Ideas:
- Summer: Use fresh berries like strawberries, raspberries, or blueberries to create a berry-infused custard.
- Fall: Pumpkin and spiced apple flavors are perfect for autumn. Try adding apple cider to the cream for a fresh fall-inspired flavor.
- Winter: Infuse the custard with cinnamon, nutmeg, and a hint of ginger for a holiday-inspired taste.
- Spring: Add hints of floral flavors like lavender or rosewater. These delicate infusions give the dessert a fresh, garden-like aroma.
These small adjustments allow you to match your dessert with the flavors of the season, making every bite feel fresh and inspired.
How to Infuse Flavors Like Lavender or Citrus
Flavors like lavender and citrus add a gourmet touch to your crème brûlée. If you want to elevate the flavor profile, infusing these ingredients is the way to go.
How to Do It:
- Lavender Infusion: Add 1-2 teaspoons of dried lavender buds to the cream as it heats. Let it steep for 10-15 minutes, then strain the buds before mixing the cream into the custard.
- Citrus Zest Infusion: Add the zest of an orange, lemon, or lime to the cream as it warms. The natural oils in the zest infuse into the cream, giving it a light, refreshing taste.
- Rosewater or Floral Infusions: Add a teaspoon of rosewater or orange blossom water to the cream before heating. Be careful — too much can overpower the flavor.
These infusions are subtle but powerful, adding floral notes and fresh, zesty hints that make your crème brûlée stand out from the rest.
If you’re looking for more creative recipes like these, check out our Perfect Crème Brûlée Recipe for more inspiration.
FAQs About Crème Brûlée
What is the Best Sugar for Crème Brûlée?
For that iconic perfect caramelization, superfine white sugar is the way to go. Why? Because it melts faster and more evenly than granulated sugar, creating that thin, glass-like crust we all love. Avoid brown sugar unless you’re looking for a deeper molasses flavor.
Can I Make Crème Brûlée Without a Torch?
Yes, you can! While a culinary torch is the preferred method, you can also use your oven’s broiler. Here’s how:
- Sprinkle sugar on top of the custard as usual.
- Place the ramekins on a baking sheet close to the broiler.
- Watch closely! It only takes 1-2 minutes for the sugar to melt and caramelize.
The downside? Broilers don’t offer as much control as a torch, so you’ll need to keep a close eye to avoid burning.
How Long Does Crème Brûlée Last in the Fridge?
Crème brûlée lasts up to 4 days in the fridge if stored properly. Cover the ramekins tightly with plastic wrap to keep them fresh. However, wait to caramelize the sugar until just before serving, or it will lose its signature crunch.
Why Did My Custard Turn Out Watery?
A watery custard is a clear sign that something went wrong. Here’s why it happens:
- The eggs weren’t tempered properly, causing them to scramble.
- It wasn’t baked long enough, so the custard didn’t set.
- Too much cream-to-egg ratio, which means not enough egg yolks to thicken it.
How to Fix It:
- Double-check your bake time.
- Be sure to temper the egg yolks by adding hot cream slowly while whisking.
Can I Use Milk Instead of Cream?
While you can use milk, you shouldn’t. Cream is what gives crème brûlée its signature richness. Milk just doesn’t have enough fat to create that silky smooth texture. If you must, try a blend of whole milk and half-and-half as a last resort.
Can I Prepare Crème Brûlée in Advance?
Yes, crème brûlée is perfect for make-ahead desserts. You can prepare and bake the custard up to 3 days in advance. Just don’t caramelize the sugar until right before serving.
What Should I Do if My Sugar Burns?
If the sugar burns, you’ll have a bitter-tasting crust. Unfortunately, there’s no way to undo burnt sugar. The best approach is to start over with a fresh layer of sugar.
Pro Tip: Keep your torch moving constantly to avoid burning one spot.
Is Crème Brûlée Gluten-Free?
Yes! Classic crème brûlée is naturally gluten-free since it doesn’t contain flour or other gluten-containing ingredients.
How to Reheat Crème Brûlée Without Ruining It?
The short answer? Don’t reheat it! Crème brûlée is meant to be served cold. If you reheat it, the texture will change, and it may become runny.
How Do I Get a Crackable Sugar Crust?
The key to that famous crackable crust is in the sugar and technique. Here’s how to get it right:
- Use superfine white sugar for even melting.
- Apply a thin, even layer of sugar across the custard.
- Torch it slowly, moving in small circles to avoid burning.
Crème brûlée may seem like a simple dessert, but mastering it requires patience, precision, and attention to detail. These FAQs cover the most common questions, but if you’re still searching for “What is the secret to crème brûlée?”, it boils down to this: quality ingredients, precise temperature control, and mastering the sugar crust.
Ready to give it a shot? Check out our Perfect Crème Brûlée Recipe and start cracking into that golden crust today!